
I wanted to make a simple dress that my daughter could wear that didn’t involve a closure. The first thing that came to mind was a peasant dress. Peasant dresses are versatile and can be worn for different occasions. In this tutorial I used a bright plaid print I got at the fabric store on sale. There was so much fabric left I actually ended up making a matching shirt.
Materials Needed:
- Fabric
- Elastic- I used 1/4inch for this dress
- Matching Thread
- Scissors/ Rotary Cutter
- Measuring Tape/ Ruler
- Pins
- Marking Pen/ Chalk
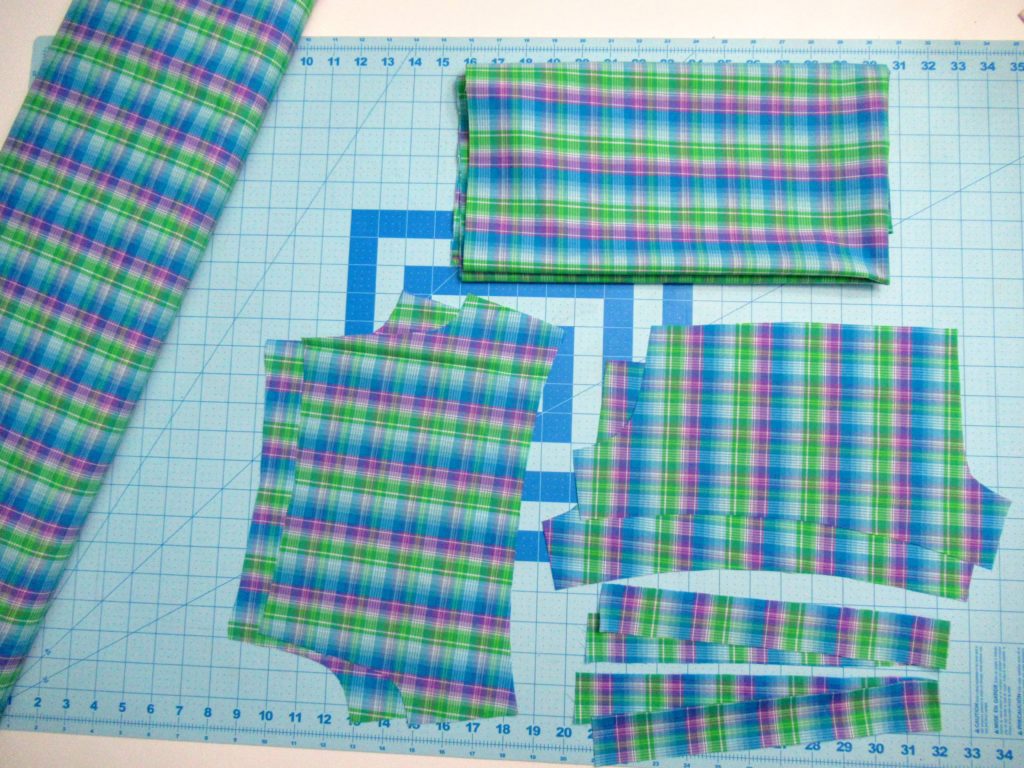
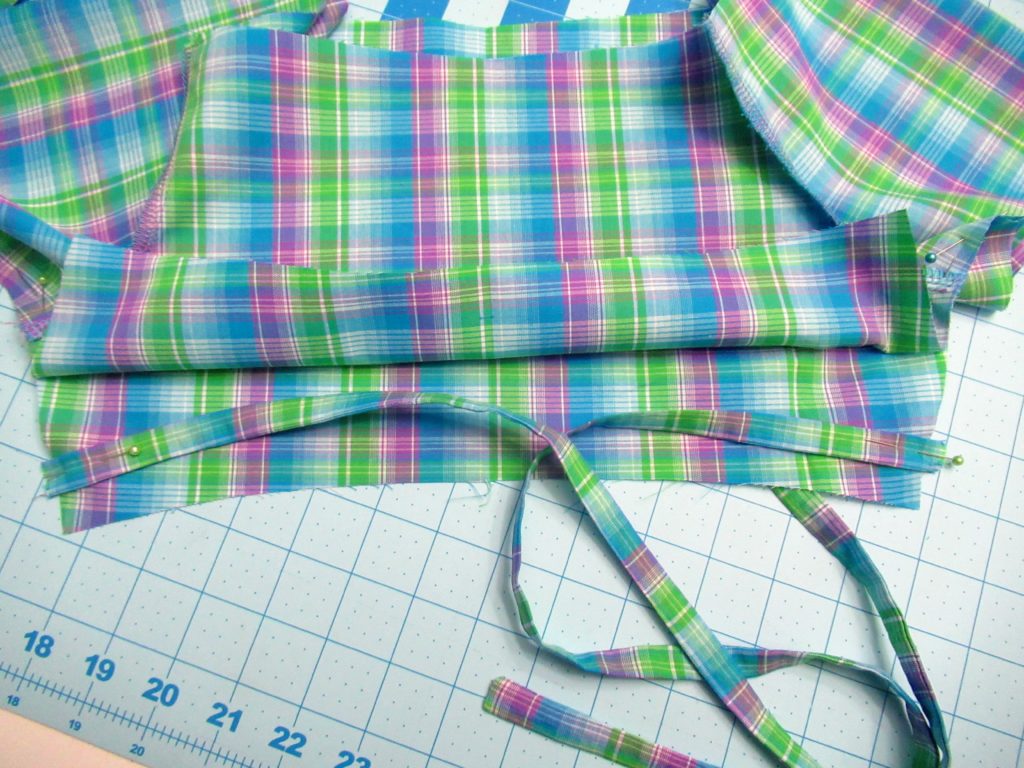
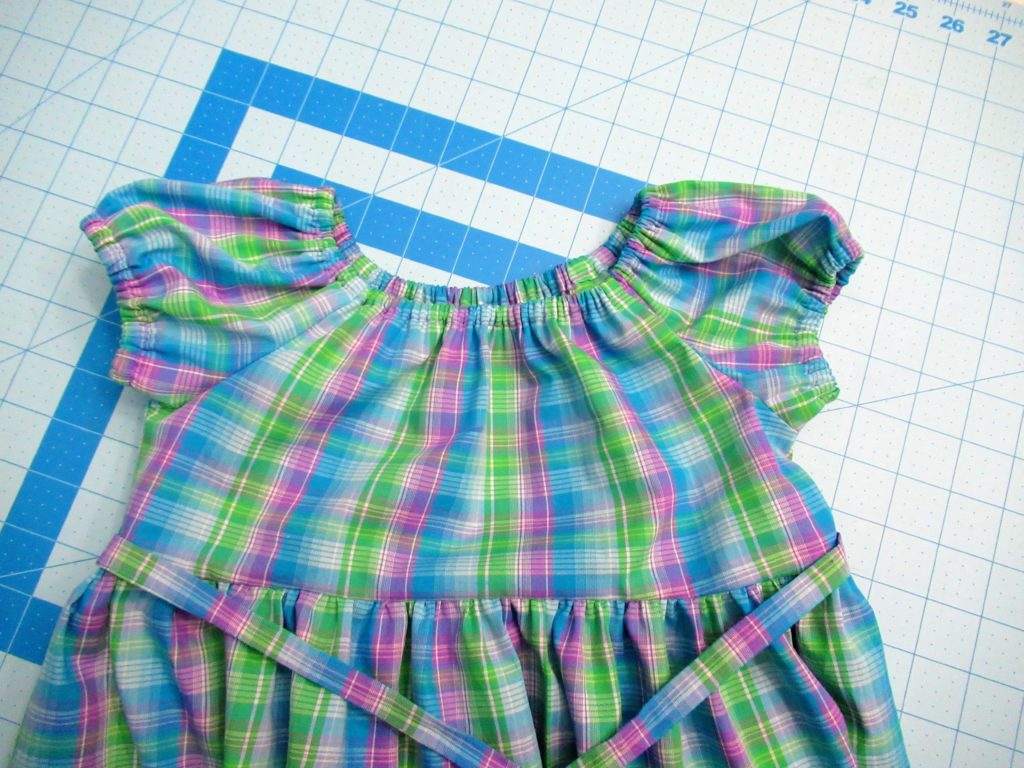
Whether you are using a pattern or drafting your own, the first step will be to cut all the pieces. You will have 5 pieces total. 2 pieces for the bodice, 2 for the sleeves and 1 rectangular piece for the bottom. As you will see, I opted to make ties because my daughter is rather slim. So, in all I had 7 pieces.
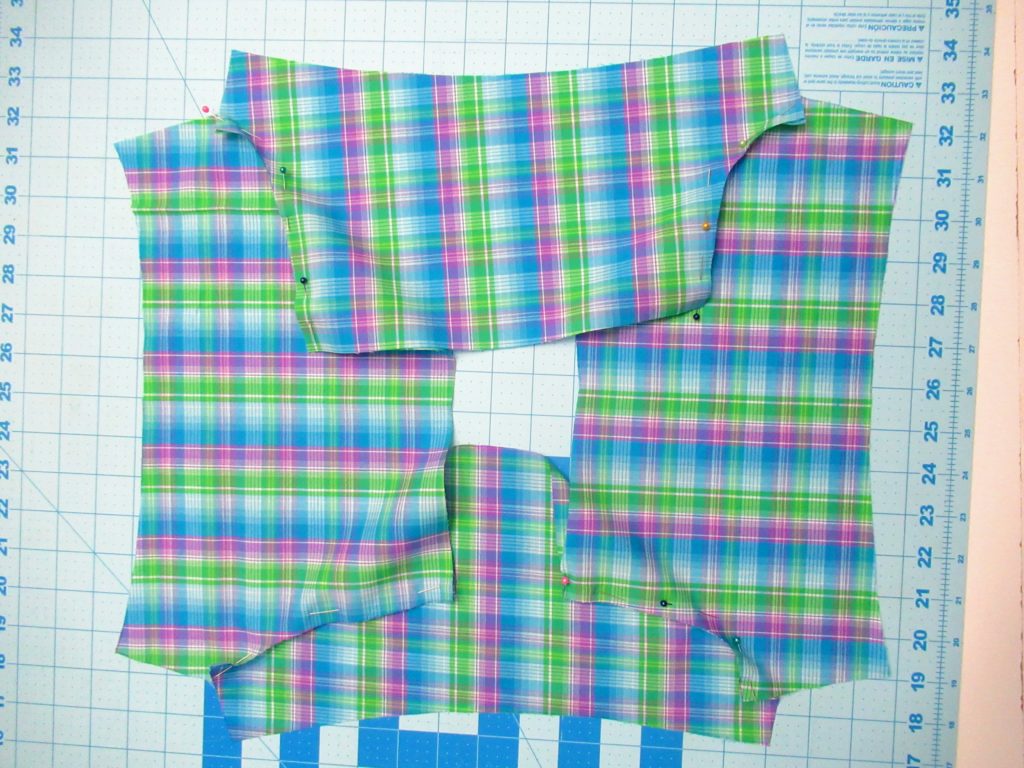
Next, pin sleeves to the body. If you are unfamiliar with peasant dresses, this may look a little weird. You will have a sleeve, body, sleeve, body pattern once its all pinned. Make sure you pinned right sides together. Sew each seam and finish the edges.
***If you’re adding dress ties, now is when you will make those. Take 2 rectangular strips of fabric. (The length and width are personal preferences.) If you will be using a loop turner, fold the strip right sides together and sew at the edge and flip. If you don’t have a loop turner it will be easier to put wrong sides together and just fold the edges of your strip inwards, press and topstitch.***
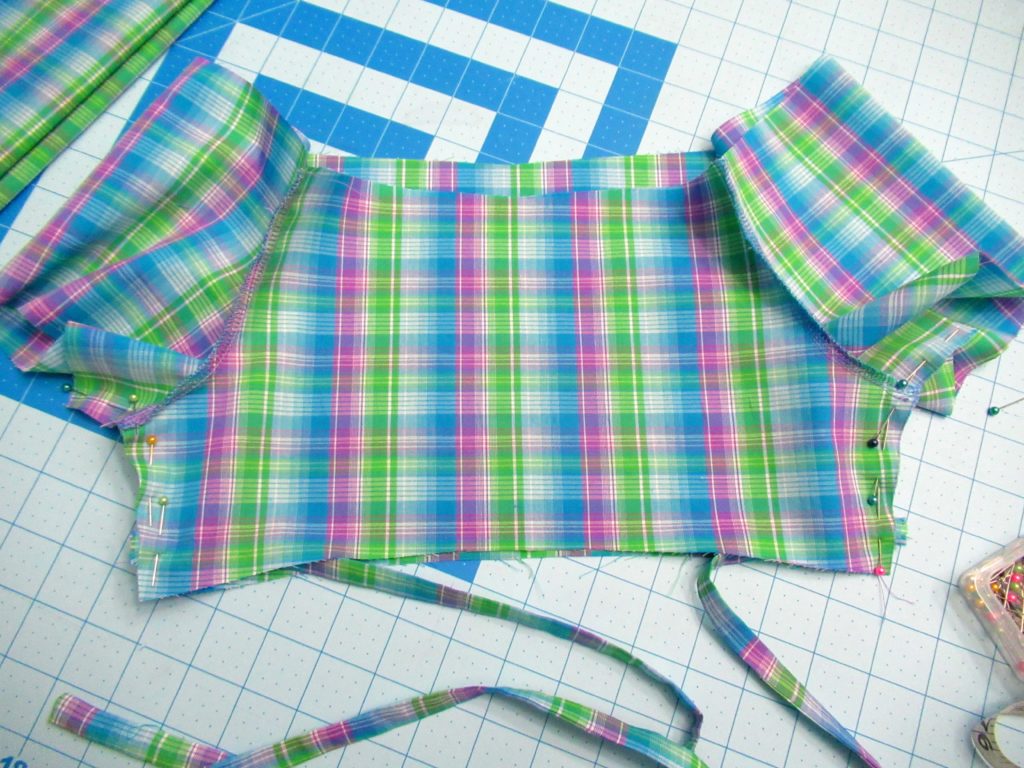
Go back to your bodice piece. Pin strips sandwiched at the sides of your bodice. Remember to leave about a half inch at the bottom. This will give room for when you sew the bodice to the bottom of your dress. Pin in place and sew.
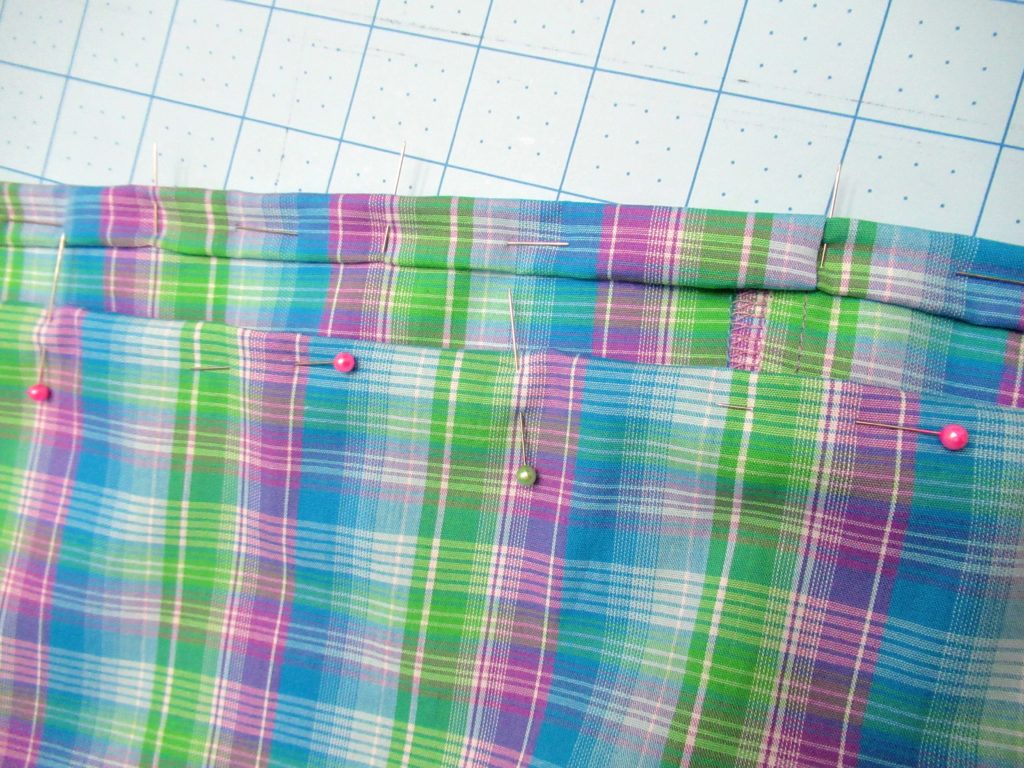
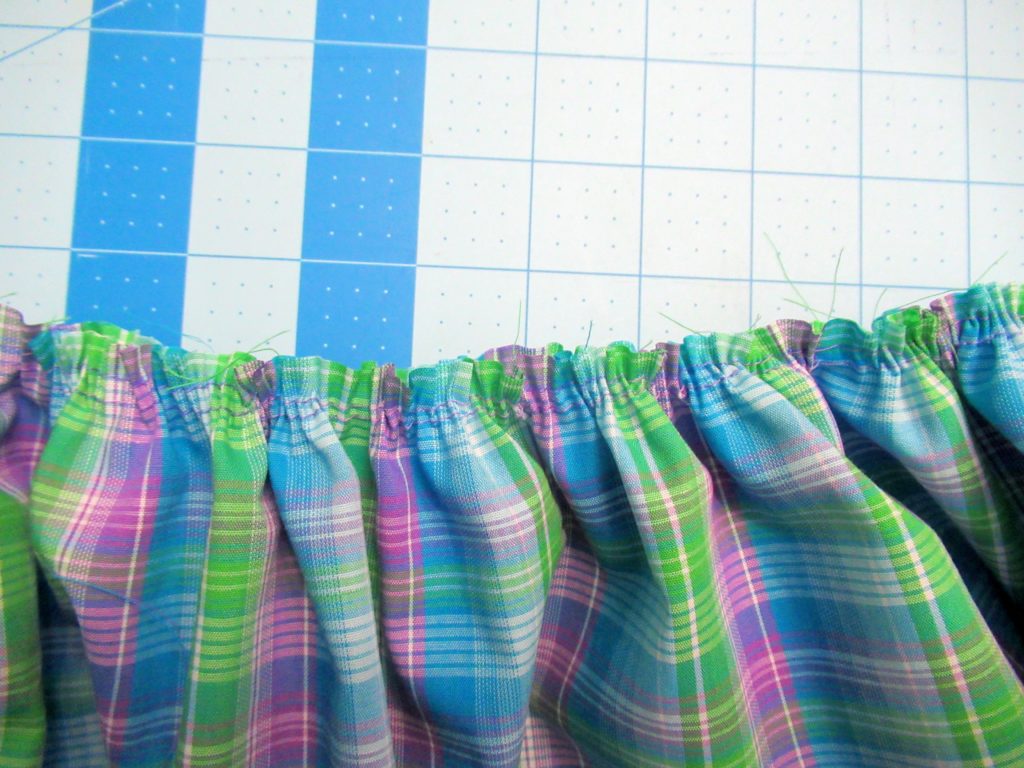
Now take the bottom piece of your dress. Gather it to the width of your sewn bodice plus seam allowance. (I did this by sewing two lines of gathered stitches with my machine.) Double check your skirt piece to the bodice after you have sewn the seam to the bottom piece together. Adjust as needed and pin to the bodice like so:
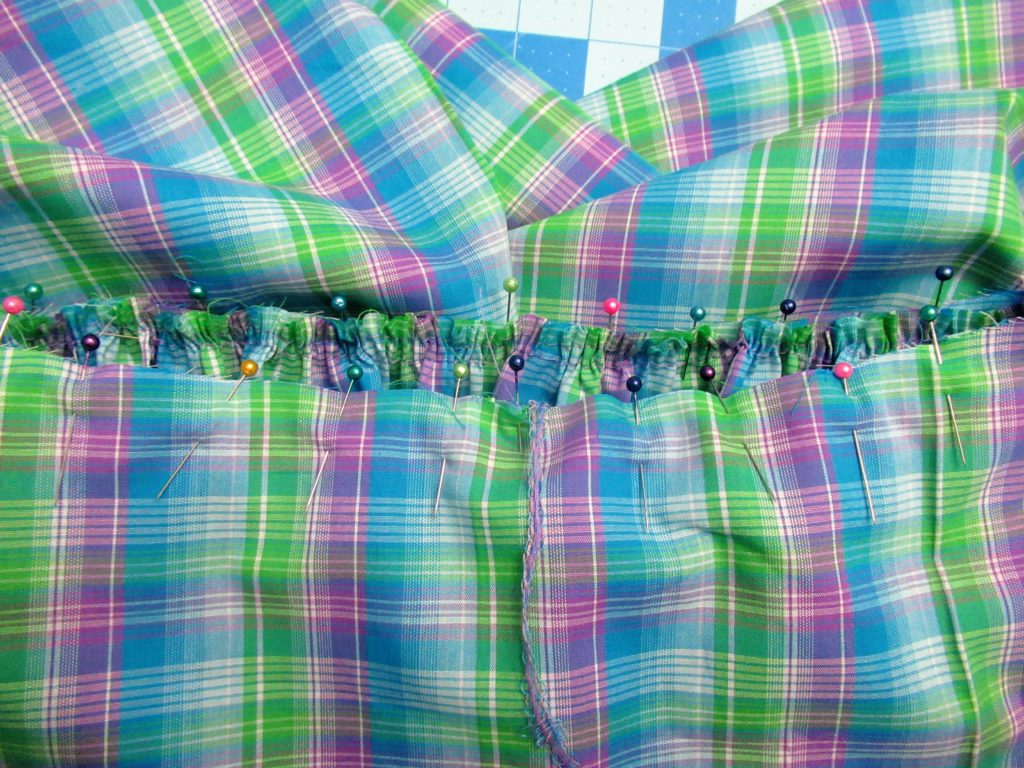
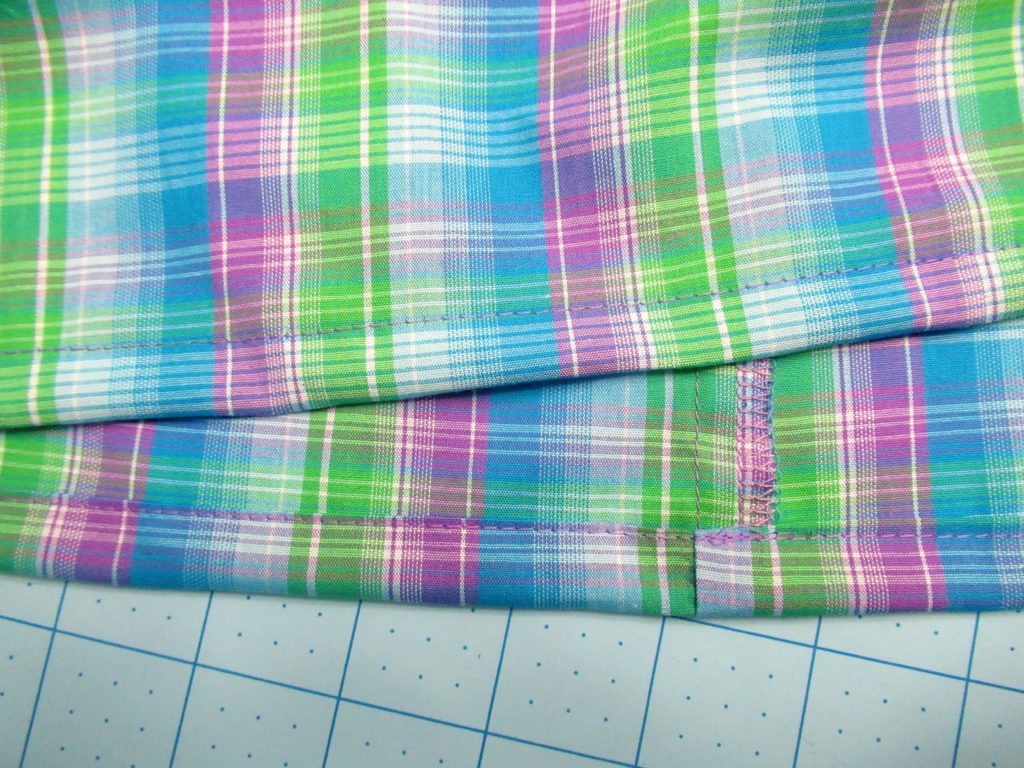
Stitch the bodice and the bottom skirt together and finish the edges. Next, take the top of the dress and fold under half an inch, press, and fold another half inch. Pin and sew leaving a gap open to pull the elastic through. The elastic I used for a 4T was 18 inches long. Try on to see if adjustments are needed. Then sew the elastic ends together and finish the neck seam. Repeat for the arms. Each arm elastic measured 9.5 inches.
Once you have finished encasing the elastic into the neck and arms, hem the bottom of the dress. Fold over twice, then sew for a nice clean finish.